Through this activity, you will be able to realize and light up your favourite constellation with Arduino.
In order to reach this goal, we will use Arduino UNO, an hardware platform used to build up projects of robotics, electronic and automation, on which a software (in C language) is installed, so as to allow us to check a series of sensors connected to the card itself, and interact with them.
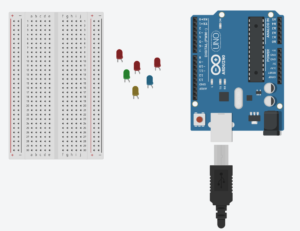
Over and beyond the Arduino card, we will need a series of leds of different colour – which will represent the stars of our constellation, whose colour depends from the temperature of the photosphere – a few connection cables and a breadboard, which will help us in placing and connecting the various leds.
Since the beginning of time, humankind has always cultivated a special relationship with the sky, at the same time charmed and scared by it. Indeed, the great celestial vault above us has always transmitted the idea of an eternal and perfect order, and a sense of infinite majesty. Each night, a myriad of bright spots – the stars – lit in the sky a wonderful spectacle, probably helping us to defeat the fear of the night world, so dark and insidious.
However, the sky vault was not only a mysterious space, at the same time charming and unsettling. With its regular motion, it was also a reference system for orientation and measurement of the passing of time. The first human beings, indeed, soon needed to foresee the season changes, so as to plan sowing, harvesting or hunting. In addition to the daytime motion of the Sun, also the Moon, with its changing form, constituted a valid watch, which measured periods longer than one day, but it did not perfectly follow the alternation of the seasons. Therefore, humankind started to associate to a given meteorological event, the appearance on the horizon of certain groups of stars. Thus the constellations were born.
The exact historical moment in which the constellations were born is uncertain, but they were certainly thought to indicate the return of the seasons, to signal the best moment to start agricultural and pastoral works, or to initiate religious cerimonies. A proof of it, for example, is constituted by the constellation of the Virgin, whose ears announced the harvest time, or Libra, which indicated the moment of the year in which the length of the day equaled that of the night, or also Aquarius and Pisces, which marked the start of the rain season and floods.
The sky panorama, in fact, does not change only during the night hours, when all stars and constellations seem to be moving in the sky from East to West, thus describing a circular motion around the pole star (this “sky movement” is only an apparent motion, due to the fact that the Earth rotates in less than 24 hours, thus always showing us different sky views), but there is also a much slower variation, due to the changing of seasons. In little more than 365 days, the Earth makes a complete tour around the Sun, so that the dark side of our planet is oriented in different directions with the passing of days.
Therefore, among the stars in the sky, each population of the Earth has immortalized its own myths, thus leaving a trace of its own knowledge and of its civil and religious history. This boundless Sky had such an immense power over the fragile humankind, that they soon started to believe that even the destiny of humankind depended from the stars. Thus, Astronomy was joined by Astrology, which responded to human fears about the future.
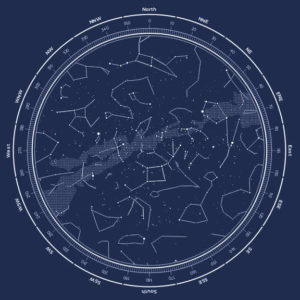
The International Astronomical Union divides the sky up in 88 official constellations with well-defined boundaries, so that each point of the celestial sphere may belong to one and only one constellation. Starting from the maps of various constellations, and analyzing the colours of the stars which compose them, with this activity you can realize your own favourite constellation, by using the Arduino board, and lighting up the stars inside them.
First of all, choose the constellation you would like to represent. Here you can find a list of all the 88 sky constellations you can choose from. After selecting the constellation, you should carefully measure the distance between the various stars which compose it, and their position, so as to reproduce precisely the constellation you have chosen. At this point, place on the base the various leds (which represent the stars of the constellation), taking care of placing them in the right position and at the right distance from each other. To make this easier, you can print the map of the constellation, in the scale you prefer, so that you already have the right organization of stars. In order to correctly represent the colours of the stars, you can use leds of different colour. The colours of a star depend from the temperature of its photosphere a: if it is very warm, the star will appear white; if it is colder, it will be yellow-orange; if it is even colder than that, it will be red.
Therefore, if we wanted to realize the constellation of Orion, which presents white, red and blue stars, we can use a red led for the red supergiant a Betelgeuse, whereas we would choose a blue led for Rigel, which is a blue giant. Attention: because of the different absorption of leds of different colour, it may be necessary to connect them to different pins.
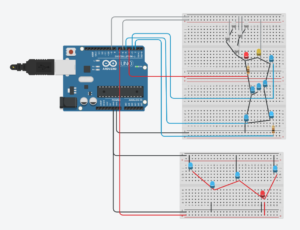
Connections of the leds:
Short end of Led —> GND pin;
Long end of Led —> pin of the Arduino board, which changes according to the constellation you represent.
Below we report as an example the realization of the constellation of Orion and Cassiopeia
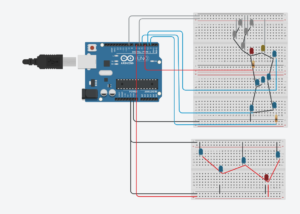
Once we have arranged all hardware connections, we can pass on to programming the board.
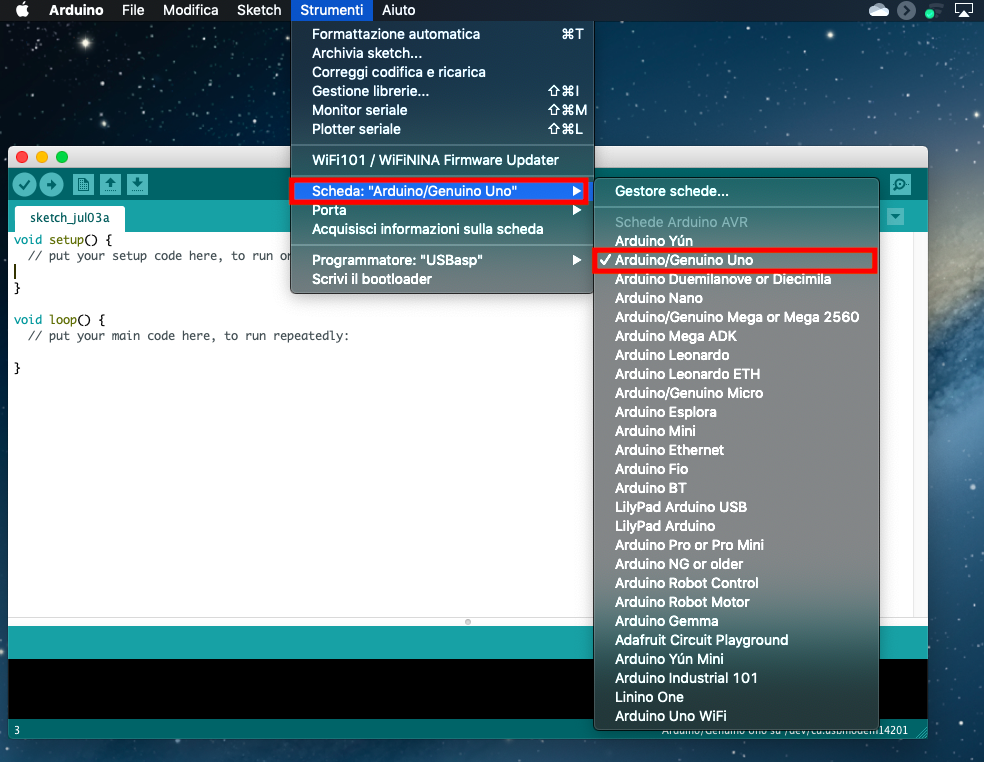
First of all, we should connect, with the right cable, the Arduino board to our pc, where we have already installed the software to check and program the Arduino board. After opening the Arduino IDE, we choose tools/board and select Arduino/Genuino Uno and, later on, we go to tools/port and choose the port in which our Arduino is connected. In this way, we set Arduino’s working environment, and we can start writing the code for our constellation. Here you can find, for example, the sketch realized for lighting up the constellations of both Orion and Cassiopeia.
 |
 |
First of all, we should open the sketch inside Arduino IDE (file/open and then select the file constellation.ino) and upload it on the board (in order to do this, you should simply click on the top left arrow, beside the checkmark).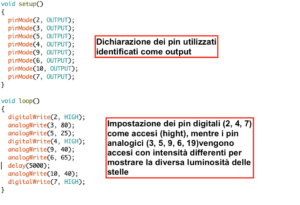
In this way, after uploading the software, we might see the constellation you have realized light up.
Please note: when using analogic pins, you can vary the luminosity of the various Leds, so as to “light up the stars” of the constellation according to the right luminosity in comparison with the others.
