On clear nights with the new Moon, with the naked eye you can admire up to 3000 stars. The Ancients, in order to orient themselves in that myriad of bright dots, ideally connected the stars with imaginary lines, thus forming groups and giving life to fantasy characters and objects, around which they embroiered storied which were handed down from generation to generation. The sky areas identified by these star groupings are called constellations, which still help us understand the night sky, find interesting objects, and orient ourselves in space and movements.
The stars of a contellation seem near, upon the clestial sphere, only because of a game of perspectives. Those stars might actually be rather far from one another: they are light source disseminated in the space. Moreover, the stars composing a constellation are never at the same distance from the Earth. For example, in the beautiful Orion Constellation, which dominates the winter sky, Betelgeuse is 498 light-years away, Belletrix is 252 light-years away, and Rigel 862. During the night, stars – and, therefore, constellations – seem to be moving in the sky from East to West, going in a circle around the North Star (a star which can be seen with the naked eye, approximately aligned with the rotation axis of a planet, and indicates one of the celestial poles). This is in fact an apparent motion, due to the fact that the Earth rotates in a little less than 24 hourse, thus always showing different sky views. The North star indicates the north celestial pole of the Earth, namely α Ursae Minoris , also known as Polaris. Since the Earth’s rotation axis completes a circular trajectory (precession) upon the celestial sphere within about 26000 years – a phenomenon called precession of the equinoxes – in the course of history several stars have boasted of the title of North Star, from Vega (the brightest star of the constellation of the Lira, the fifth most luminous star of the night sky, and the second most luminous star of the southern hemisphere, after Arcturus), to Thuban (a star of the constellation of Draco), passing from Alrai (aka γ Cephei, a double star located in the Cepheus Constellation, 45 light-years far from the Earth).
The celestial landscape does not change only during the night. Indeed, there is a much slower transformation, due to the changing of the seasons. In little more than 365 days, the Earth makes a complete tour around the Sun, so that the dark side of our planet is oriented in different directions with the passing of the days. Fortunately, the stars always keep the same position with respect to one another, so that, once we learn to recognize a constellation, we can always identify it throughout the course of the days, when it is visible in the night sky.
The International Astronomical Union divides the sky up in 88 official constellations with precise borders, so that each point of the celestial sphere belongs to one constellation only. The descriptions we have written for this laboratory reproduce 8 constellations, which are clearly visible in the summer and winter sky. The details of each constellation are listed in each card.

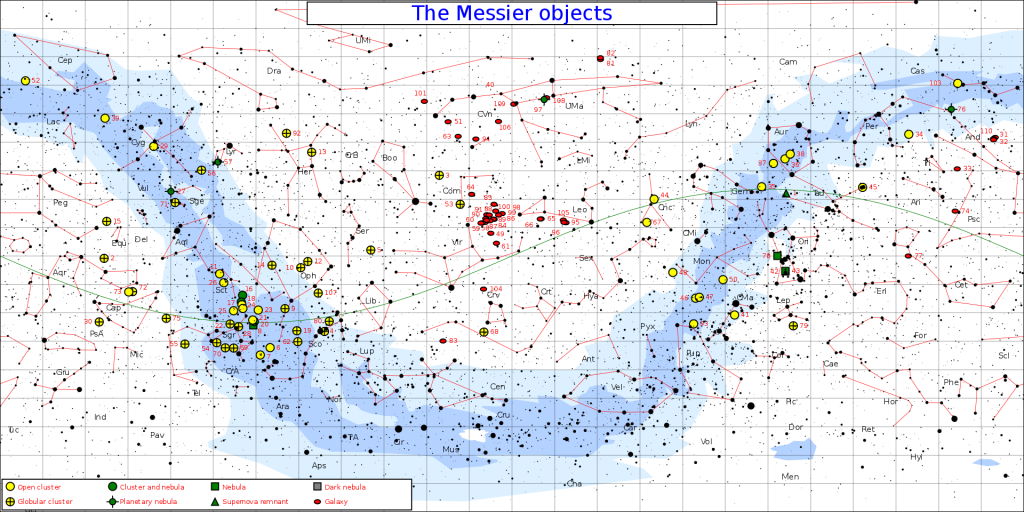
We have indicated in the single cards, where applicable, the objects of the Messier Catalogue, which was the first astronomical catalogue of celestial objects other than the stars. It was compiled by the French astronomer Charles Messier and was published in 1774. Messier was a comet hunter, just like several astronomers at the time. He was involved in the compiltation of the catalogue in order to easily distinguish a new comet, which can be seen with a telescope like a weak nebular object, from similar objects fixed in the sky and different from comets. The first edition of the catalogue included 45 objects, numbered from M1 to M45. The final list includes 110 objects, numbered from M1 to M110.
Messier catalogue consists of quite bright objects, some of which can even be seen with the naked eye; this is why it is still widely used by amateur astronomers. In star charts, an object belonging to the Messier catalogue can be recognized by the prefix M before its number. The listed objects are very much heterogeneous: the only connection among them is their diffuse aspect, and their relative brightness. This description is valid for both nebulae, star clusters which are near to one another, and large galaxies, located at huge distances.
Note. Inaf researchers are bringing this laboratory in the schools and at the main Science Festival in the country, with all the necessary materials. In this page, we provide instructions, a list of materials, and cards for each constellation, for all those who want to carry out the laboratory independently. Indeed, this laboratory can be made even without a printer, simply by copying on a cardboard the (approximate) positions of the stars in the constellation you want to reproduce, and using our cards as a reference.

Necessary materials:
- coin-cell battery (CR 2025)
- copper tape with conductive adhesive (width 6-8 mm; if you buy the 12mm one, you can cut it in half)
- 3 mm white led diodes
- a pin in order to pierce the cardboard
- a clip
- scissors, in order to cut the copper tape
- card of the constellation printed on the cardboard (or a simple cardboard, on which you can reproduce the constellation, as shown in the card). If you print the card on a A4 sheet, do not adapt the page as you print it, because the dots representing the stars on the front must correspond (in position) to those of the back (on which pupils will realize the circuit).
The constellation cards we have prepared can be found here, in order of increasing difficulty:
- Lira
- Cassiopeia
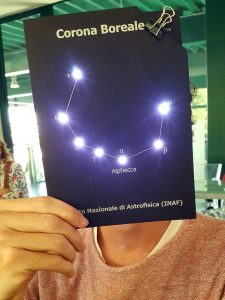
- Corona Borealis
- Big Dipper (part of Ursa Major)
- Bootes
- Eagle
- Orion
- Cygnus
How to build up the circuit
The stars (i.e. the led diodes) of the constellation will light up, thus creating an electric circuit on the back of the cardboard, using a conductive copper tape (notice that the tape must have a conductive adhesive), led and a 3 volts batter. As a general rule, in order to turn on a light you need energy: in this case, energy is provided by the battery. You can check this yourself by connecting the long led foot to the positive battery pole, and the short one to the negative pole. If you get it wrong, and connect the led the other way round, it will not light up, because it is as if the door to let the current run were left shut.
Since we need to light up several stars, led diodes must be connected through an electric circuit. The connection can be made in two different ways: either in series, or in parallel. In this case, we shall connect them in parallel, because this kind of connection offers the advantage that, in case one led were broken or badly connected, the other ones can work all the same.
Here are the steps for the creation of a circuit:
- Make two holes, about 2 mm apart on each star of the constellation (white dot), while placing the cardboard on a cloth, in order to avoid piercing either the table or your own fingers.
- On the back of the cardboard, attach the copper tape along the tracks, while paying attention to cut the tape in half if it is too wide (before peeling it), because with a thinner tape it is easier to realize the circuit, and you also save tape. Careful in overlapping the tape well at the changes of direction, thus creating an “X” at the ontersections. The two tracks, + and -, should never touch, otherwise you risk a shortcircuit, and the battery is gone.
- Insert the LED feet in the holes and connect them, by folding them, to the two tracks of conductive tape, caring to make the long foot touch the positive track, while the short one should touch the negative track. The feet should be fixed with more tape (a small piece, on the point in which the foot overlaps the tape). Place the battery on the positive track, just upon the symbol of the battery (in the corner). Fold the cardboard along the dotted line, and block it with a clip. In this way, the positive side of the battery lies on the positive track, whereas the negative one is touched by the negative track. All the stars should light up.
- If one or more stars do not light up, check the connections, in particular between the long LED foot with the positive track.
- If none of the stars lights up: check whether you have provoked a short circuit, or whether the battery is upside down.
